Ethernet
Plug in an Ethernet cable and the device gets a stable wired connection. The 100M Ethernet port and WiFi provide mutual backup — each link has its own IP, either one can reach the management interface, and if one drops the other keeps working. Supports DHCP (auto) and static IP. No router? Try Ethernet Direct Mode — one cable to your computer, the device becomes a DHCP server.
When using Ethernet and WiFi together, place them on different subnets to avoid routing conflicts. For example, Ethernet on
192.168.1.x, WiFi on192.168.2.x.
Specifications
| Item | Details |
|---|---|
| Interface | RJ-45 |
| Speed | 10M/100Mbps, auto-negotiation (100M port — negotiating to 100Mbps with a gigabit router is normal) |
| Default state | Enabled |
| MAC address | See packaging box label: ETH: xx:xx:xx:xx:xx:xx |
| PoE | Not supported — requires external PoE splitter module |
Need PoE? → Accessories & Expansion.
OLED Display
After plugging in Ethernet, the "X" on the OLED network icon disappears and the second line shows the IP address. IP prefix is E (e.g., E192.168.1.100), E = Ethernet.
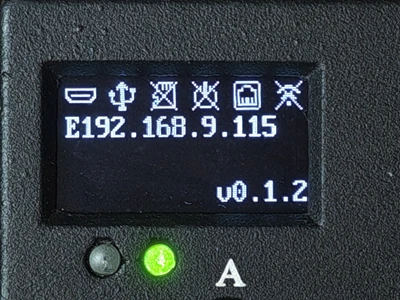
While acquiring IP, the display shows E Loading.... If it takes more than 20s → check that the cable is firmly plugged in and the router has DHCP enabled.
When no Ethernet cable is plugged in, the "X" stays on the network icon. More OLED info → OLED Screen.
Software Configuration
Go to Web interface → Settings → Network.
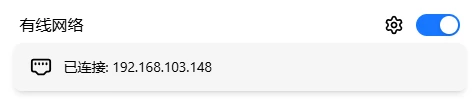
Enable / Disable
Click the toggle on the right side of the card. Disabling turns off the Ethernet interface. Saved configuration is preserved.
Turning off both Ethernet and WiFi means you can't access the device. Keep at least one enabled.
Network Status
The card shows the current status:
| Status | Meaning |
|---|---|
| Connected, IP: x.x.x.x | Normal |
| Cable not connected | Interface enabled but no cable plugged in |
| Disabled | Interface is turned off |
Network Configuration
Click the gear icon on the left side of the card to open the configuration dialog (three tabs):
Details
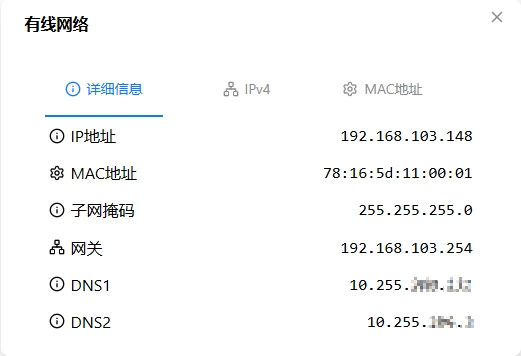
Read-only display of current parameters: IP address, IPv6 address, MAC address, subnet mask, gateway, DNS1–3.
IPv4 Configuration
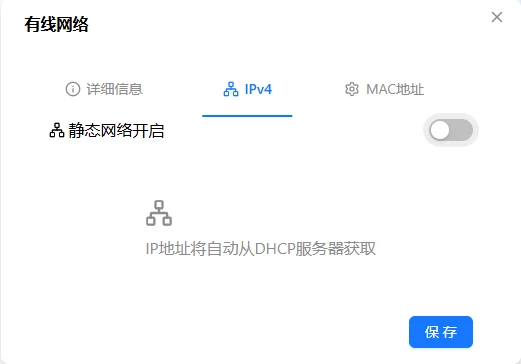
DHCP (default): Router assigns automatically.
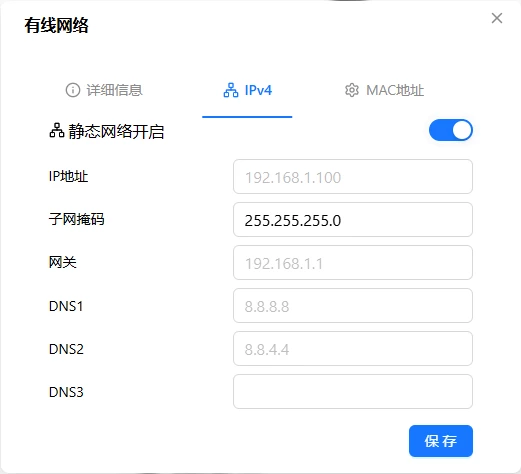
Static IP: Manually set fixed parameters.
| Field | Description | Required |
|---|---|---|
| IP address | e.g., 192.168.1.100 | Yes |
| Subnet mask | e.g., 255.255.255.0 | Yes |
| Gateway | e.g., 192.168.1.1 | Yes |
| DNS1 | Primary DNS | No |
| DNS2 | Secondary DNS | No |
| DNS3 | Tertiary DNS | No |
When switching to static IP, make sure the parameters are compatible with the current network — otherwise you'll lose connectivity.
Click save — takes effect immediately.
MAC Address
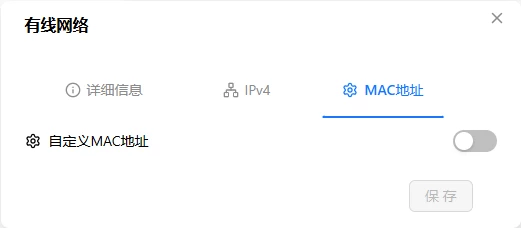
Default uses the factory MAC (printed on the packaging box). You can also set a custom one:
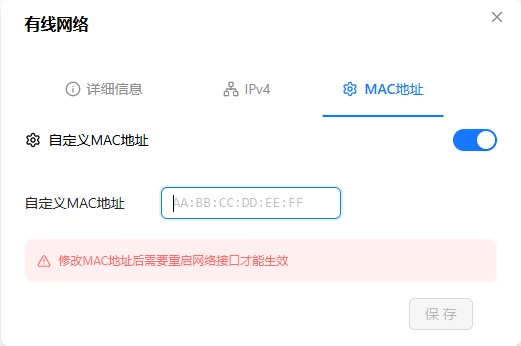
Format: AA:BB:CC:DD:EE:FF (six groups of hex, colon-separated).
⚠️ Changing the MAC takes effect immediately and may cause disconnection. Some routers refuse to recognize a new MAC. If you can't reconnect after changing it, use Provisioning Mode (long-press Button A 1–3s) to recover.
Verification
| Check | How |
|---|---|
| OLED | Does the IP start with E? |
| Web interface | Does the Ethernet card show an IP address? |
| Network test | Can another device ping that IP? |
Troubleshooting
| Symptom | Likely cause | Try this first |
|---|---|---|
| Ethernet light off | Cable loose or bad | Re-seat both ends, or try another cable |
| Light on but not blinking | Router port issue or DHCP disabled | Try a different router port, check DHCP |
| OLED shows "E Loading..." >20s | DHCP not responding, IP pool exhausted | Verify DHCP is working and has free IPs, or use static IP |
| Only 100Mbps with gigabit router | The device is a 100M port | Normal — not a defect |
| Static IP set but can't connect | Parameters incompatible with network | Use Provisioning Mode to re-configure |
| Changed MAC and can't connect | Router rejects the new MAC | Use Provisioning Mode to re-configure |