HTTPS Configuration
FlexKVM encrypts access via HTTPS, offering two certificate modes: self-signed and custom.
Go to Settings → System → HTTPS Configuration.
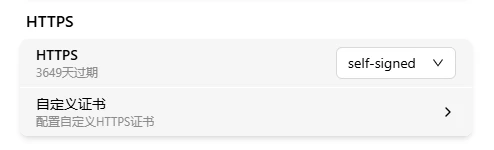
Certificate Mode
| Mode | Description |
|---|---|
| Self-signed certificate | Auto-generated by the system; enabled by default |
| Custom certificate | User-uploaded CA-signed certificate |
The dropdown shows the remaining validity period of the current certificate.
Self-Signed Certificate
Auto-generated on first boot. The communication is encrypted, but browsers don't trust the certificate and will show a "Not Secure" warning. To remove the warning, upload a CA-signed custom certificate. The system auto-renews before expiry.
Custom Certificate
Click "Configure Custom HTTPS Certificate" to upload files:
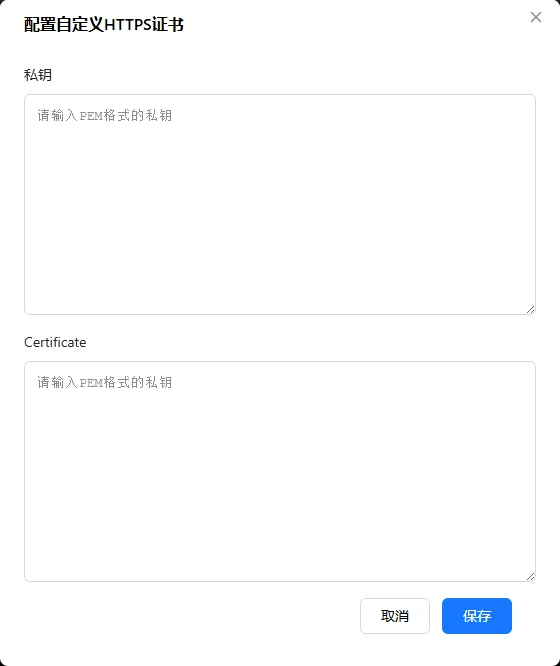
| Field | Description |
|---|---|
| Private Key | PEM format RSA or EC private key (starts with -----BEGIN PRIVATE KEY-----) |
| Certificate | PEM format X.509 certificate (starts with -----BEGIN CERTIFICATE-----) |
Certificate in another format (.pfx, .jks)? Convert to PEM using OpenSSL first. The system validates that the certificate and private key match; after validation, switches to custom mode. If a custom certificate expires, the system auto-falls back to the self-signed certificate — access is not interrupted.
Verification
| Check | How |
|---|---|
| Browser address bar | Visit https://<device-IP> — look for the 🔒 icon |
| Certificate details | Click 🔒 to verify it's your uploaded custom certificate |
| Validity period | HTTPS settings page shows remaining valid time |
Ports
| Protocol | Default port |
|---|---|
| HTTP | 80 |
| HTTPS | 443 |
HTTP access is automatically redirected to HTTPS.
Troubleshooting
| Symptom | Likely cause | Try this first |
|---|---|---|
| Upload says mismatched | Private key and certificate aren't a pair | Verify the private key corresponds to this certificate |
| Browser still warns after upload | Still using self-signed certificate | Confirm you've switched to custom certificate mode |
| File won't upload | Format is not PEM | Convert to PEM using OpenSSL |